Module 8: Brow Mapping Techniques / Brow Asymmetry
Brow mapping is a very important aspect of the procedure and often the most challenging one for therapist at the beginning of their career. Correct and precise mapping will assist you in the next step of the pigment implantation.
THREAD MAPPING TECHNIQUE
- Cleanse your clients brows and take before pictures from different angles
- Ask your client to sit up on the bed and do the following :
- Raise their brows and relax
- Frown as much as they can and then relax
- Raise brows again and relax
This will show you the side with the strong muscle. Usually the side with the strongest muscle is the left one but there can be exceptions.
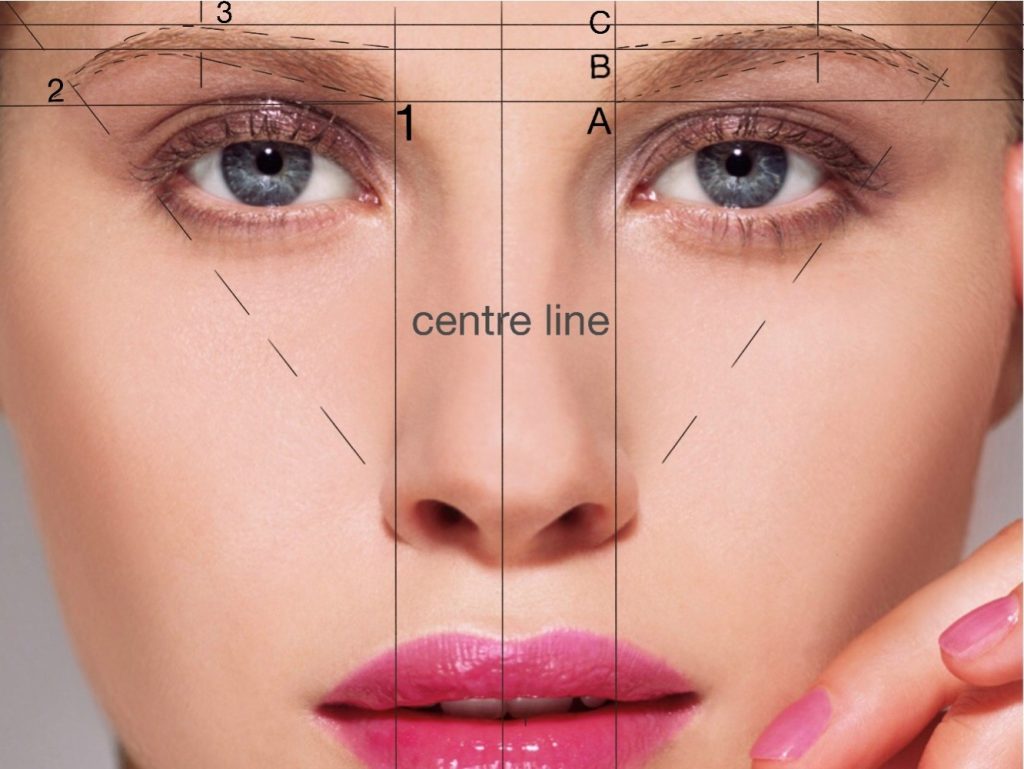
- YOUR SYMMETRY LINES WILL BE:
- Bottom of the Bulb (A)
- Top of the Bulb (B)
- Top of the Arch (C)
- Line B will determine the thickness of the brow. The closer to Line A is the thinner the brow will be and vice versa.
Line A will be where the brow bone is.
Line C will determine how low or high your arch will be. Look where the arch is naturally higher and accordingly draw your Line C to create symmetry. The closer Line C is to Line B the lower the arch will be.
- Ask your client to lay back on the bed and draw your centre line( D). Line D will start on the bridge of the nose.
- To find inner corner and the start of the brow bulb, go on the crease of the nose and and mark a straight line. Don’t go from where nostril ends as some people have wider nostrils. Measure both these lines with a small calliper and check if they are even.
- Find your Arch and the highest point of the brow. Usually highest point is 4.5mm from the centre line.You can use your a small caliper to measure this distance. It works in 80% of the cases. Another method to find the arch is by finding the end of the iris and drawing a straight line towards the brow.
- Time for the connection lines (LINE 1 and 2). Draw your lines with a sharp wax pencil. Your connection line should be almost parallel to each other .Once you reach the arch both lines should meet on the tail.
- Ask from the client to sit up, measure again and double-check everything. Small adjustments might be necessary at this stage.Use a clear thread to see if both sides are the same.
- Soften a bit the meeting points of the connection lines and use a surgical marker to dot your brow. This will help you with the distance of your strokes. It might be useful to draw with a pencil your foundation strokes too.
- Show your client your brow design and take a picture.
- Your brow mapping is finished and you can start stroking!
USEFUL BROW DESIGN TIPS
Look at your client’s eyes, face shape and eyelid shape.
If eyes are uneven then brow will look uneven.
Adjust your height when drawing line A, B, C and this will create the illusion that brows are more even.
Ask your client to frown and raise their brows as much as they can! You will see that when they relax which side has a stronger more active muscle. This will help you with your design and evenness of both sides.
Look at their face shape and features. Not everyone will suit a thick and fluffy brow. Use the brow bone! Our brows should naturally follow the brow bone curve.
Map with the eyes open. Muscles will not be active when eyes are shut. So once eyes are open your symmetry will be affected!
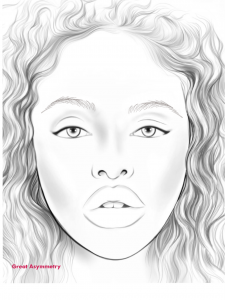
GREAT ASYMMETRY ON FACIAL FEATURES
Have you ever wondered why it’s so hard to get both of your eyebrows to look the same? That is because our faces are not symmetrical and it is often very rare to meet clients that will not need adjustments. There are a number of reasons why this occurs.
BONE STRUCTURE:
The bone structure may stick out a little more on the one side the forehead which means that one eyebrow may be rounder and the other eyebrow will sit flatter and appear squarer. Additionally, the bone structure near the temples can also protrude a little more on one side. This is why when you look at your brows front on, it may appear that the tail of one eyebrow is shorter. That doesn’t necessarily mean that the brow is short. It is simply that you can not see the whole eyebrow from a front view, because the temple bone sticks out a little more.
MUSCLE TONE:
The muscle tone in our face can change the eyebrow shape as well. Often the muscle tone is stronger on one side which means one of your brows will sit higher than the other.
HAIR GROWTH:
The way that the hair grows on each eyebrow can also be different as well. One eyebrow can have hair that grows straight up towards the hair line and the other can have hair that sits straight along the brow bone or points down towards your eyes.
These asymmetry problems can also worsen due to wrong brow shaping or with age. As we age the muscle tone gets looser and the hair growth slows down. That practically means that these asymmetries will be more obvious.
Great asymmetry on eyebrows can not be solved solely by a microblading / permanent makeup artist and is often good to collaborate with a very experienced botox practitioner / plastic surgeon. Botox injections and some other aesthetic procedures can help immensely with brow symmetrisation. During your consultation discuss the matter with your client and set realistic expectations in regards to how far you can help as a practitioner. If the client doesn’t wish to go down the aesthetic route prior to having their eyebrows tattooed, then you will need to both agree that these minor adjustments meet her expectations and that compromises need to be made.
BROW MAPPING ASYMMETRICAL BROWS
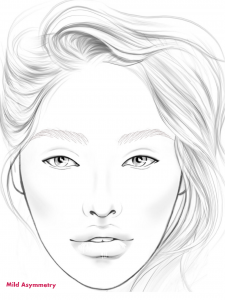
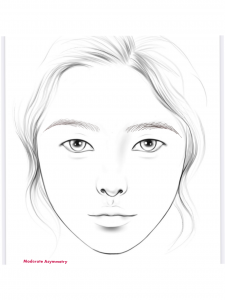
The main principles do not change but we will highlight the compromises that need to be made during mapping so that we can achieve more evenness. Remember this will not apply for severe cases of asymmetry but for moderate to mild cases.
STEP 1
Take a before pictures and ask your client to sit up on the bed and set your ring light straight across .
STEP 2
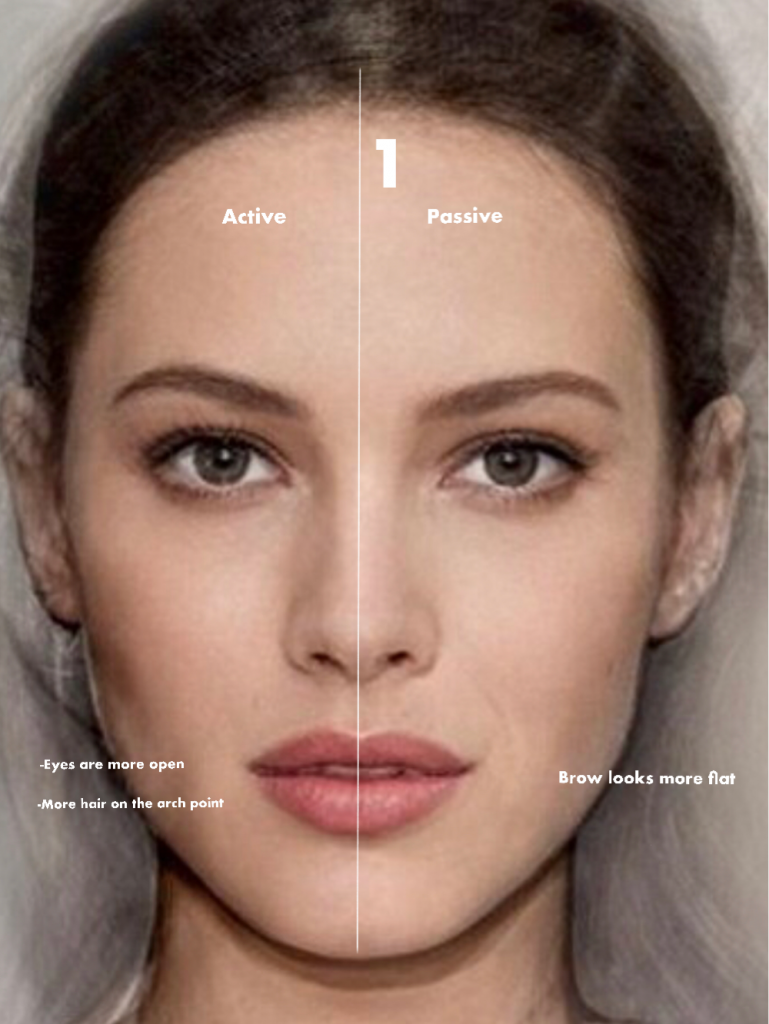
Draw with a white china marker pencil your centre line and look for the active and passive side of the face. Often on the active side of the face the eyes look more open, brow bone is more prominent and the arch sits higher.

STEP 3
Find the highest point of the active side and then the lowest point of the passive side and mark these points with a white gel pen.
STEP 4
Find the highest point of the passive side and then the lowest point of the active side. Mark these points with a gel pen.
STEP 5
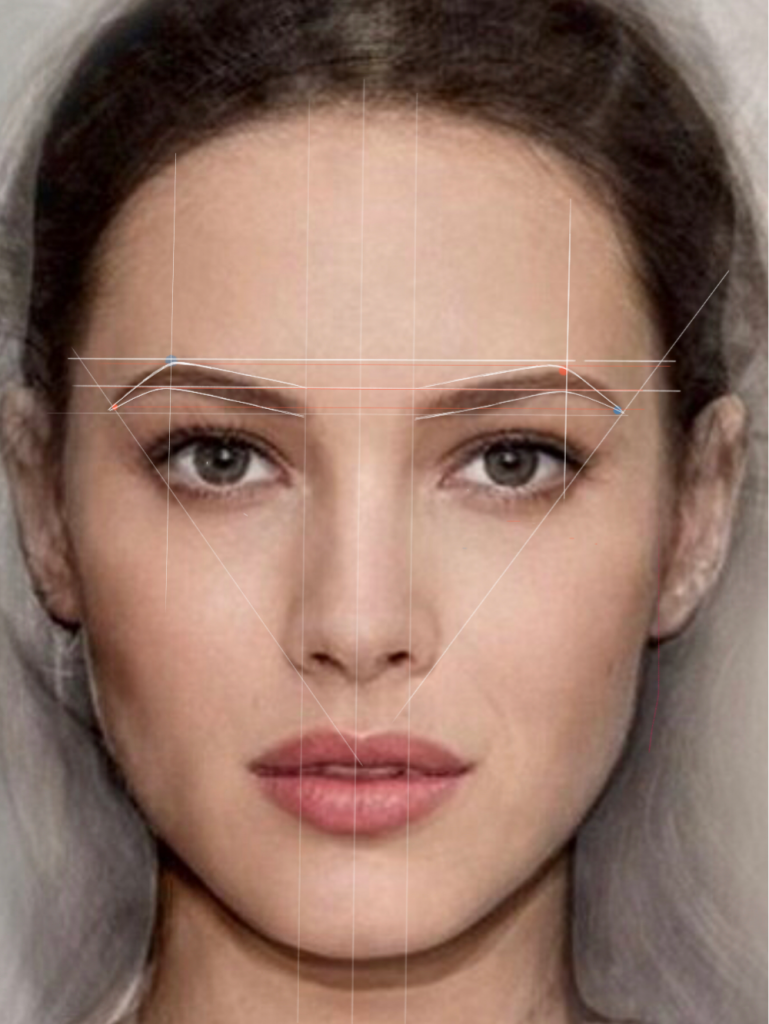
Compare both sides in regards to lowest and highest points and balance them out. You will need to bring the active brow down and the passive brow up. Mark with an inked thread your basic mapping lines A,B C (bottom of the bulb, top of the arch, top of the bulb).

STEP 6
Connect the highest points with the lowest points with a straight line and decide where the starting point of the eyebrow will be by marking vertical lines.
STEP 7
Then draw straight mapping lines which will connect all the above points.
STEP 8
Soften and curve the meeting points, measure the distances between all meeting points( from tail to arch, from arch to start of the bulb, centre line to highest point and thickness of the brows).

STEP 9
Remove any hairs around the shape.